Practice 5
You can see a completed example here:
You will need a photo editor in order to complete this practice exercise.
GIMP is a free photo editor that has many of the same features as Photoshop.
You can find the GIMP Documentation here.
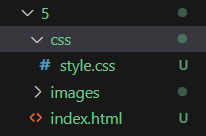
Create a "5" folder with folders inside named "css" and "images". Also create an
index.htmlfile.
In
index.html, add the basic HTML structure for a page:<!doctype html>
<html lang="en">
<head>
<meta charset="utf-8">
<title>REPLACE THIS WITH A TITLE FOR YOUR PAGE</title>
<meta name="description" content="REPLACE THIS WITH A DESCRIPTION OF THIS PAGE IN SENTENCE FORM.">
</head>
<body>
<!-- REPLACE THIS COMMENT WITH THE CONTENT FOR THE PAGE -->
</body>
</html>Within the "css" folder, create a new CSS file.
Find an image file. Any image is fine. We will use this file to practice basic image editing.
Start up GIMP (or your photo editor of choice).
Open your image file in the photo editor.
Change the size of the image. In GIMP, you can do this by going to
Image -> Scale ImageGIMP Documentation: Change the size of an Image for the screen
Export the image file using an appropriate image format.
Make sure to export the image file to the "images" folder within your practice 5 folder.
There are several options available in the settings for optimizing the image for the web. Feel free to experiment with different options (and file formats) to see how they affect the size of the file and the quality of the image.
GIMP Documentation: Getting Images out of GIMP
infoWhen using GIMP, you can also save images as
XCFfiles.These types of files will not work in web pages. They are only for use on your computer.
For those of you with Photoshop experience: XCF is the equivalent of a
PSDfile.It saves all of the image information so you can go back later and make changes—then export it again in a format suitable for the web.
Open the original image file again. This time, crop the image.
After dragging the box to the desired area, you can either double-click or hit the
Enterkey to crop the image.GIMP Documentation: Crop An Image
noteMake sure to export the image file with a unique name.
For example, I named my files
toad_resized.jpgandtoad_cropped.jpg.And make sure to export the image file to the "images" folder within your practice 5 folder.
Open the original image file once again. This time, add some text to the image.
GIMP Documentation: Text Management
Also See: How to Outline Text in GIMP
infoAfter exporting this image, you should now have 3 image files with unique names.
For example, I named my files
toad_resized.jpg,toad_cropped.jpg, andtoad_text.jpg.Add a stylesheet link within the head in
index.html.Notice the
hrefvalue. Since our CSS file is within a folder named "css", we need to usecss/at the beginning of the URL.<!doctype html>
<html lang="en">
<head>
<meta charset="utf-8">
<title>Practice Excercise #5</title>
<meta name="description" content="Practice Exercise #5 has been a splendid experience.">
<link rel="stylesheet" href="css/style.css">
</head>
<body>
<!-- REPLACE THIS COMMENT WITH THE CONTENT FOR THE PAGE -->
</body>
</html>Within the body, add several paragraphs of text. Lorem Ipsum dummy text is fine.
Add 3
<img>elements in order to embed your 3 image files (resized, cropped, and text added).Make sure each
<img>element has analtattribute that provides a description of the image.Float one
imgto the left of some text.Float one
imgto the right of some text.tipIf your images and/or text are not displaying correctly, see "Clearing Floats" in Lesson 5.
And take a look at the HTML code in my Practice 5 Example.
Center one of the
imgelements on the page.noteYou can see a completed example here:
Use the CSS
background-imageproperty to add a background image to any element of your choosing.You could use one of your 3 image files for this or find another image to use as a background-image.
Make sure the image file is within your "images" folder for Practice 5.
infoThe CSS file is inside of the "css" folder. So, you'll need to begin the URL with a dot-dot-slash (
../).Your URL will look something like this:
background: url(../images/way_awesome.png);Use the
background-positionproperty.Use the
background-repeatproperty.
You can see a completed example here:
- Push your changes to your Github repository.