Technical Setup
We will create practice web pages throughout this course.
But before that fun can truly begin, we'll need to do some configurations, some installations, and a free registration :)
1. Enable viewing of file extensions
Make sure you can see the file extensions in file names on your computer.
For example, if you have a file named monkey.jpg on your desktop, you should see monkey.jpg — not just monkey

If not, you will want to change a setting in your operating system:
Mac Instructions
- Go to
Finder > Preferencesand clickAdvanced. - Make sure "Show all filename extensions" is selected.
Windows Instructions
- Open any folder on your computer (or search for
File Explorer). - Click the "View" tab.
- Check "File name extensions".
2. Create a folder named webdev1
Create a folder on your computer named webdev1.
We will use this folder for storing our practice exercise files.

3. Install Git
Git is a version control system that is used by most web developers these days.
Download Git and install it.
All of the default installation settings should work fine.
For more information, see the Git documentation.
4. Create a GitHub account
We're going to use a free service called GitHub to host our web page files. This will allow you to share a link to your pages with anyone in the world.
GitHub is an online service that uses the Git version control system.
Other people will be able to see your GitHub username. Choose wisely.
This name will represent you online and will be a part of your website URL:
https:// username_here .github.io
5. Install Visual Studio Code
Visual Studio Code (VS Code) is an extremely popular code editor that works on Mac, Windows, and Linux.
6. Configure VS Code
Once we get all of this set up, we will be able to publish our practice exercises to the web from within VS Code.
Start up VS Code.
Open your
webdev1folder by going toFile -> Open Folderand locating the folder on your computer.Create a blank file named
.nojekyllinside yourwebdev1folder.Notice that it begins with a period.
And those are 2 lowercase L's at the end of the file name:
.nojekyllinfoBy default, GitHub uses a program called Jekyll that automates a lot of website creation stuff.
But we want to learn how to do these things on our own.
So, we are adding this
.nojekyllfile to inform GitHub that we do not want to use Jekyll.But it's not important that you completely understand this step right now. We just need to do this to move forward.
Go to
Terminal -> New TerminalWe need to establish your Git username on your computer.
This username does not have to be the same as your GitHub.com username.
It's common practice to use your first and last name. For example, if your name is "Timmy Tucker", you would type the following command and then hit the
ENTERkey:git config --global user.name "Timmy Tucker"Replace
Timmy Tuckerwith your username of choice.noteIf successful, you will not get any response after hitting
ENTER.If you get an error message, try again.
Enter another configuration command to provide your email address, such as:
git config --global user.email "[email protected]"Replace
ttucker@trucker.comwith your email address.Close VS Code.
7. Connect VS Code with Github
Make sure you are logged into your GitHub.com account in your web browser.
Start up VS Code.
If your "webdev1" folder is not already opened, you can go to
File -> Open Folderand find the folder.Select the
Source Controltab and click thePublish to GitHubbutton.When prompted, click the appropriate options to allow GitHub access.
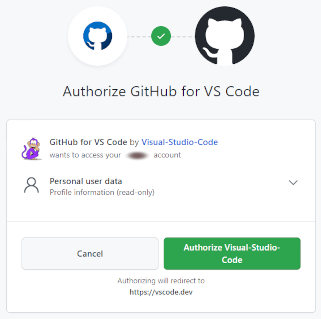
In addition to the prompts shown in the video below, you may also be prompted in your web browser to Authorize GitHub for VS Code.
Select
Publish to GitHub public repositoryMake sure there is a checkmark next to
.nojekylland clickOKIf prompted, click
Sign in with your browser.Verify that the
webdev1repository was created on GitHub.com
8. Make repository accessible on the web
Within your webdev1 repository on GitHub.com, click Settings and then Pages.
Under Build and deployment make sure that Deploy from a branch is selected for "Source".
Under Branch, select main and click the Save button.
If you are using an older GitHub account, the branch might be named master instead of main.
Proceed to the Practice 1 page to begin creating your first web page!